Building Reusable Speaking Resources: A Photo Romance
Gary R. Collins, Switzerland
Gary R. Collins, Lic. phil. I, teacher of English and History in Basel. He studied Theology, English Literature, and History in Basel and has written so far unpublished stories for his students. Current interests include all sciences and the introduction of a yearlong “Studium Generale” at universities covering the frontiers of all subjects compulsory for all students. E-mail: garycollins@bluewin.ch http://web.mac.com/collins.com
Menu
Introduction
Requirements
For your own motivation
Making a story
Photo shooting
Simple Desk Top Publishing: lots of work
Imagine creating resources that are fun for teenagers and are good enough to be reused. It’s all been done. But teachers are reluctant to share, aren’t they. They profess to share according to their leftist ethics; they give you material, but what is best they keep to themselves, very unlike Jamie Oliver, which is more like right wing ethics, or a good part of both. Now here’s the recipe for a long-lasting piece of resource:
- You need to have a digital camera (I used Canon Power Shot S 50 with 7 mega pixels)
- You need to proficient or semi-proficient with Word 5 or later
- You need to have a school or private printer which can do colour prints and OHPs
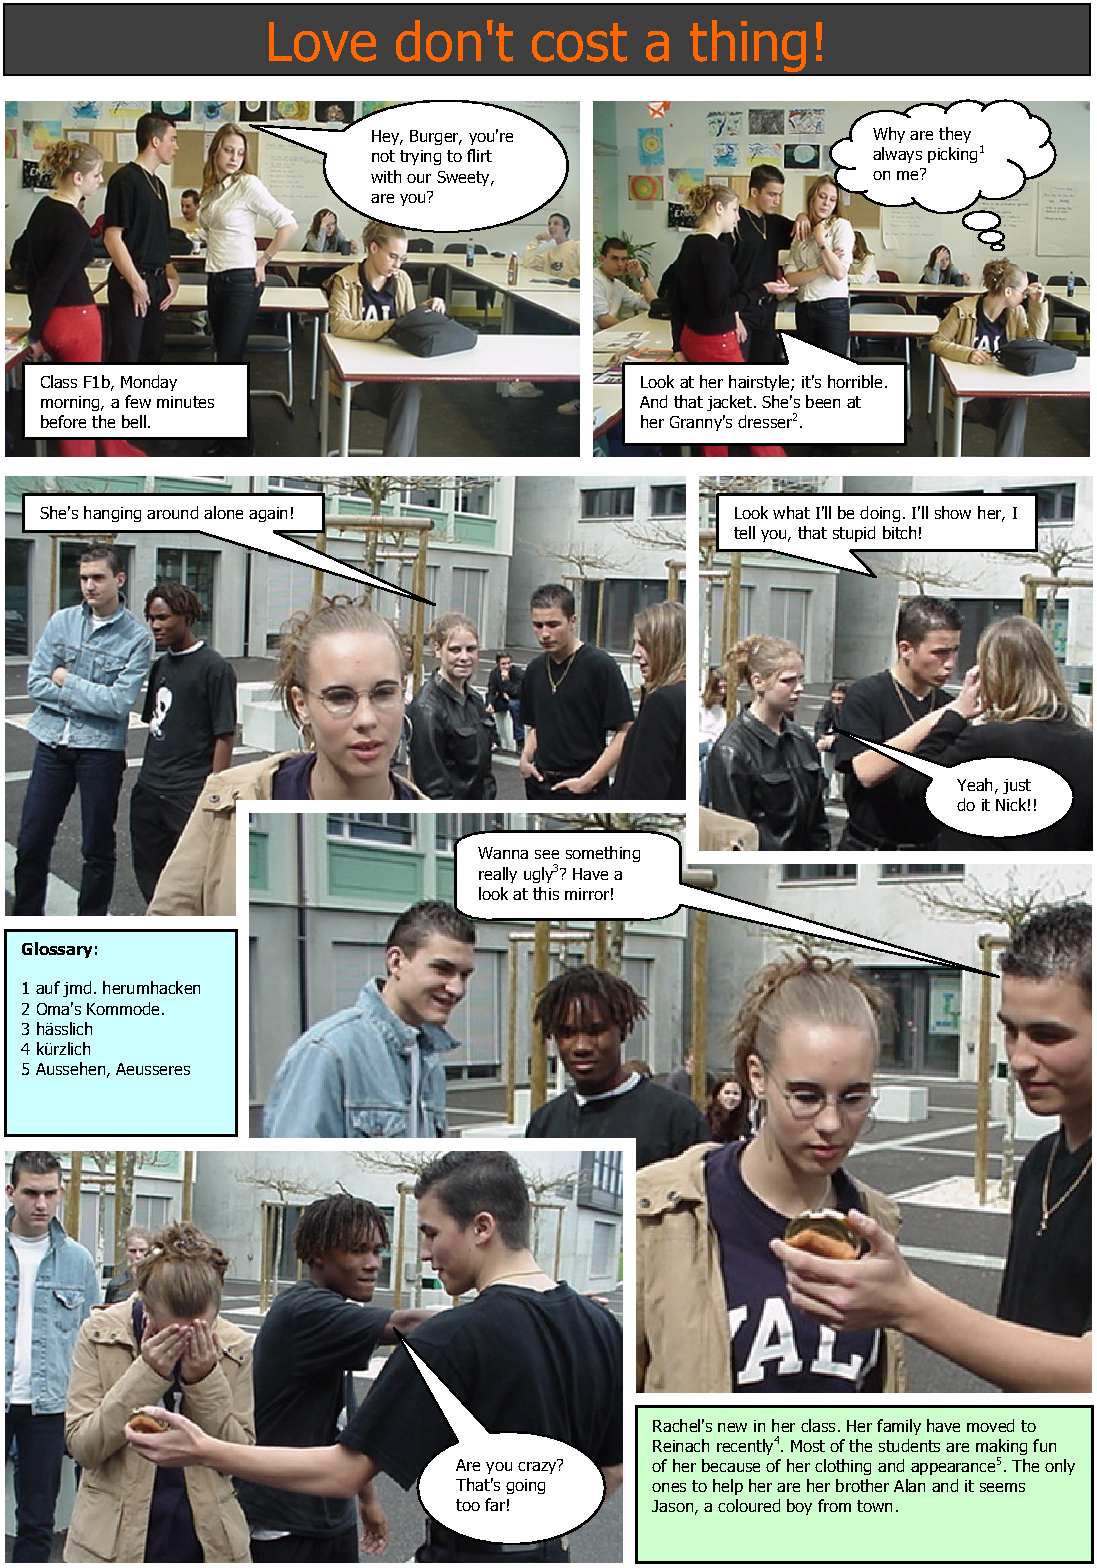
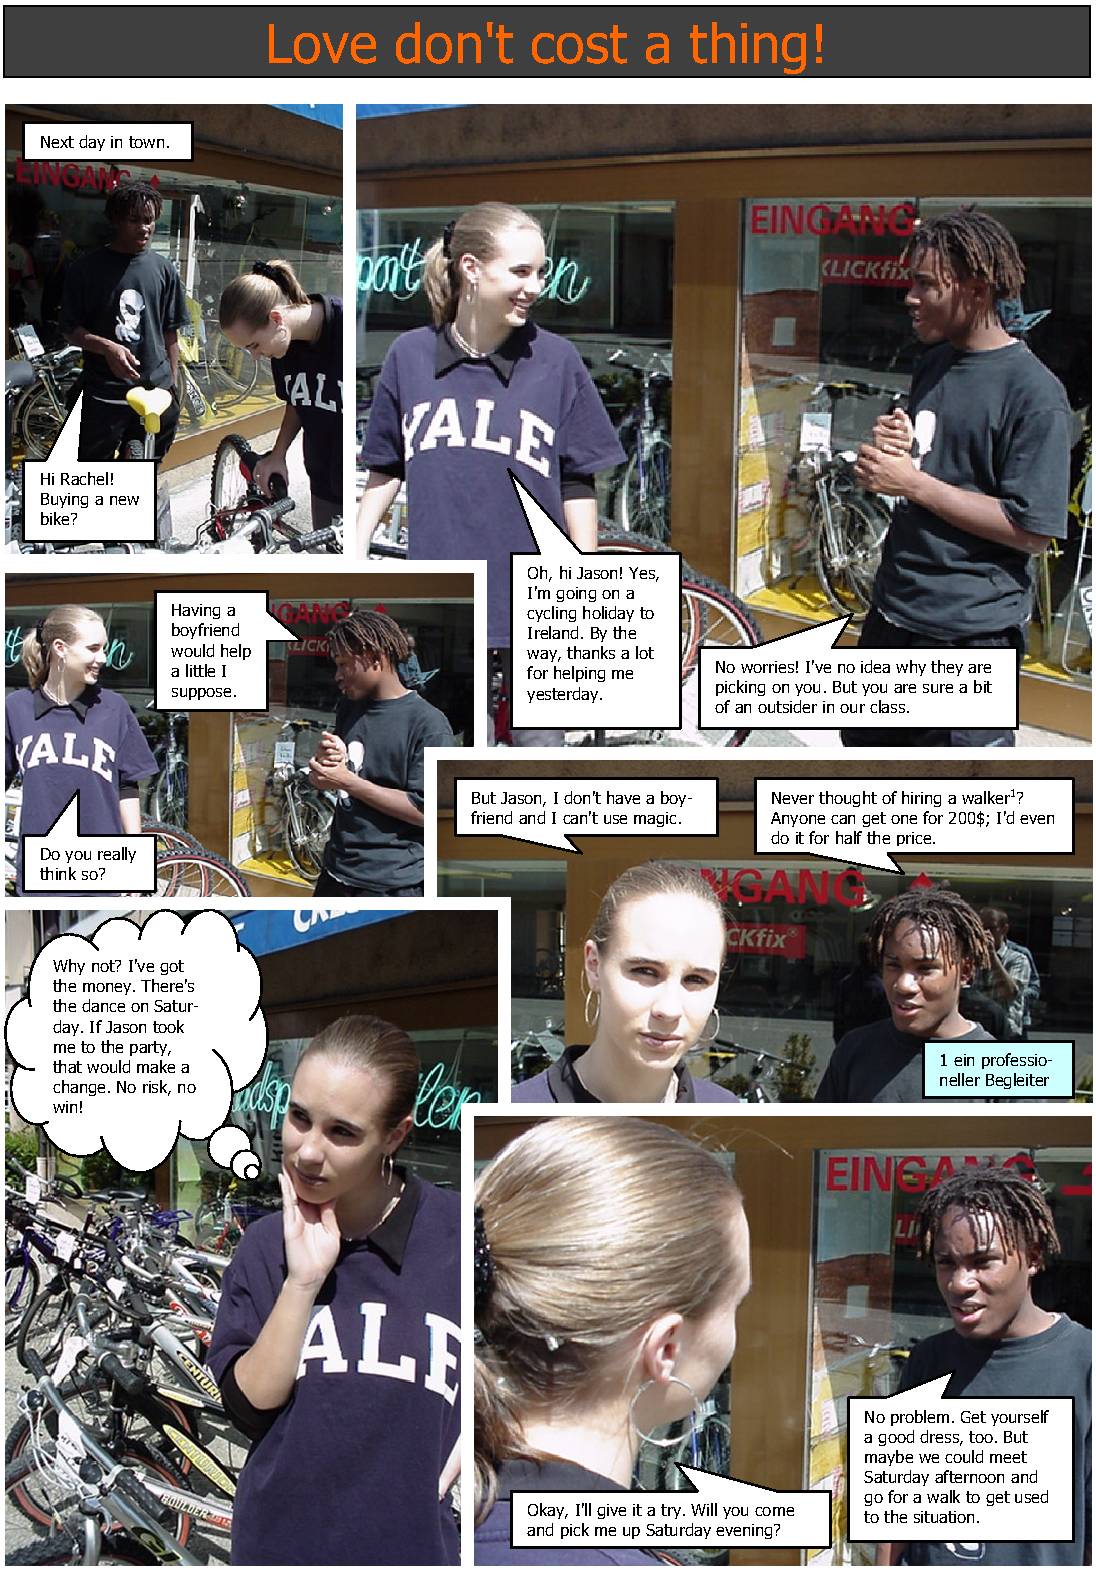
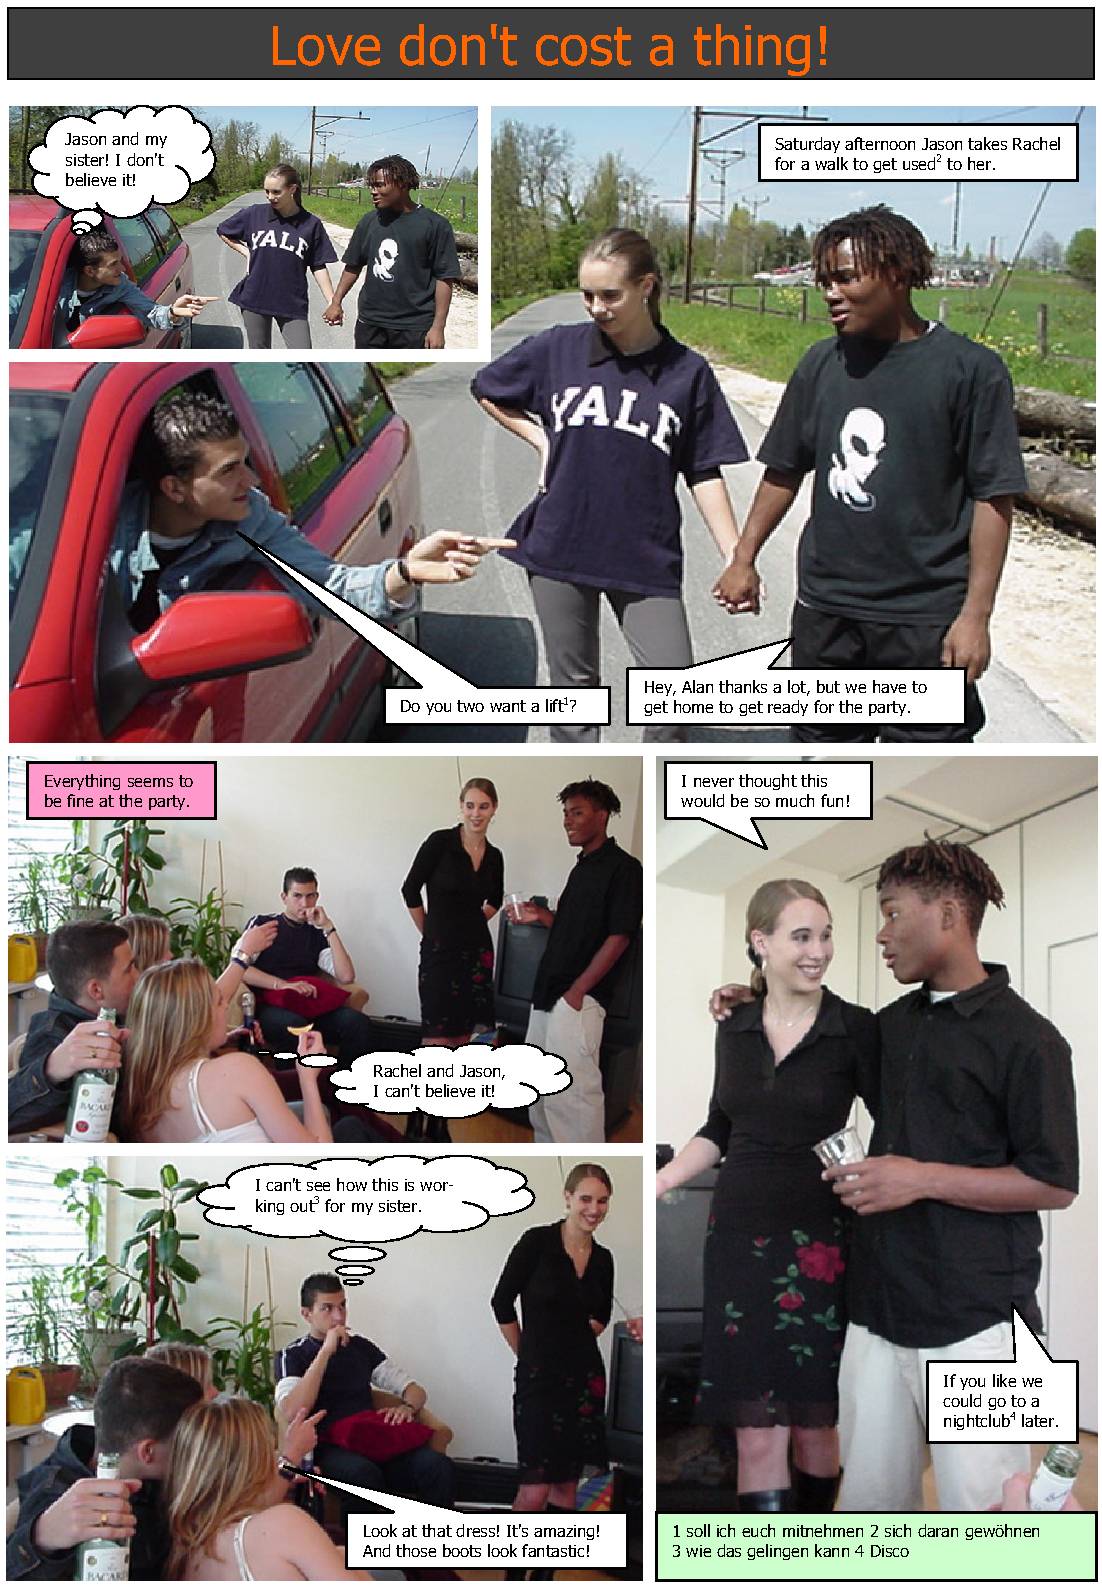
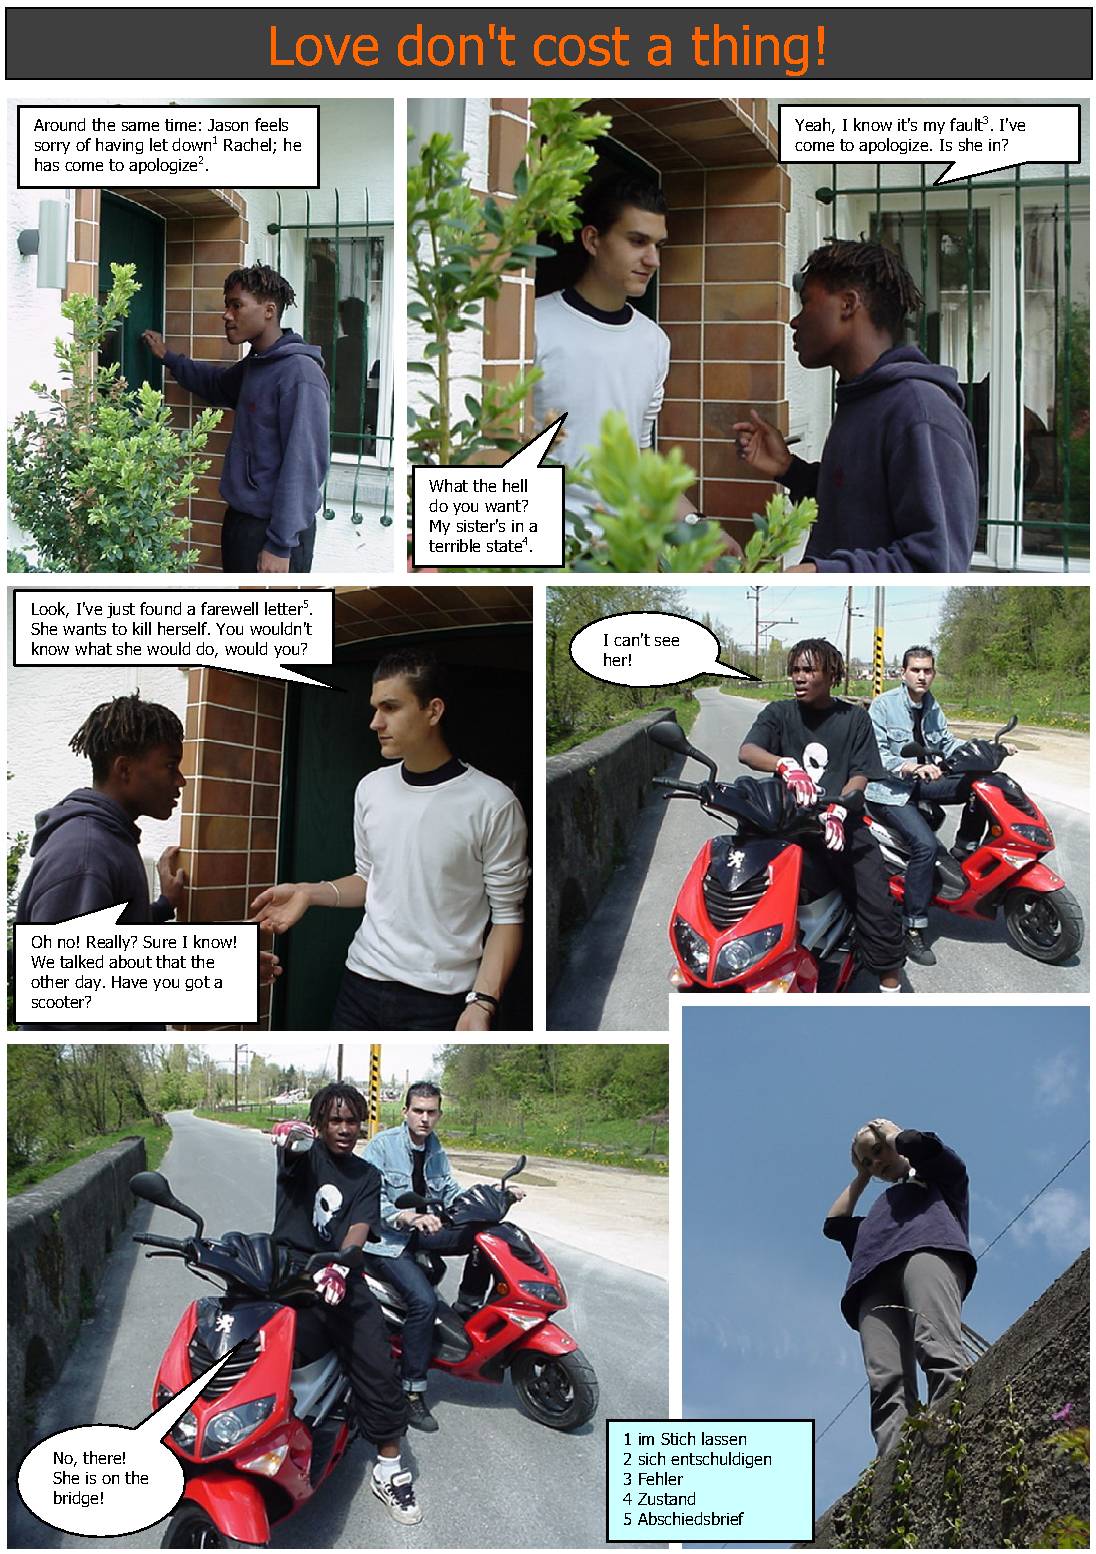
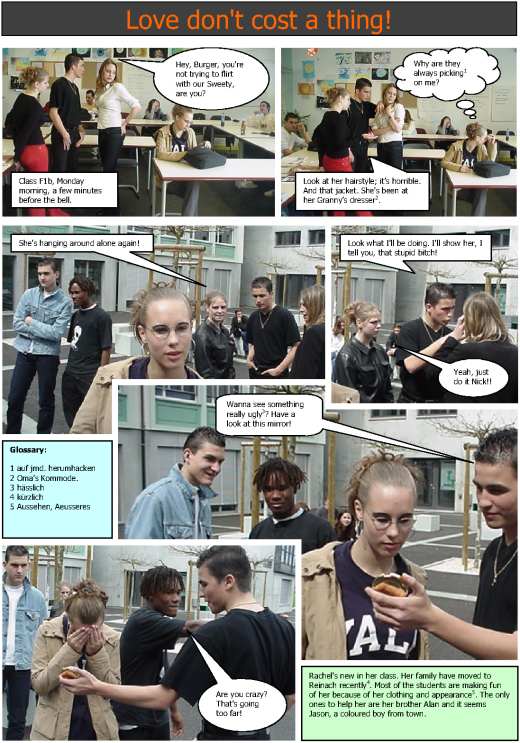
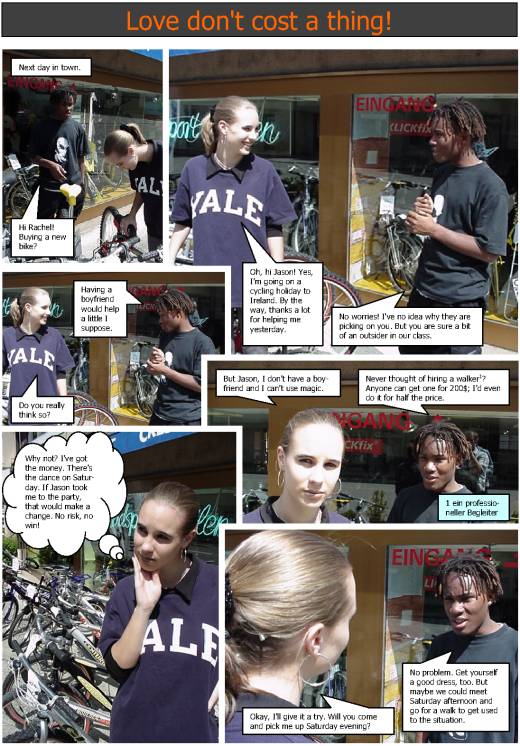
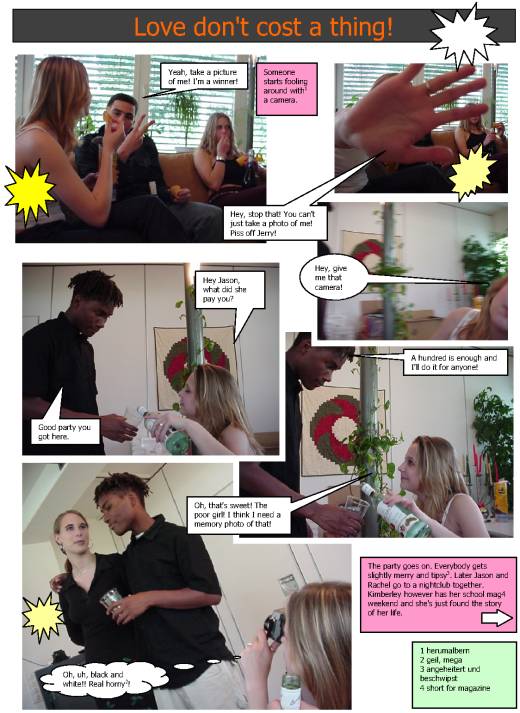
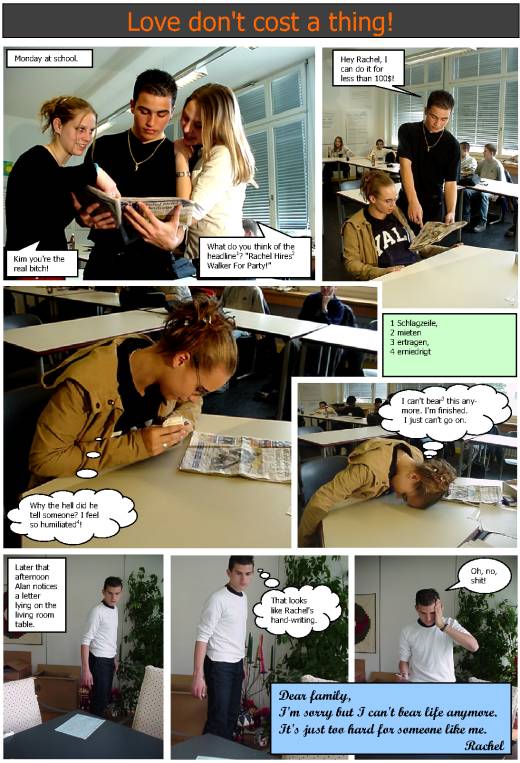
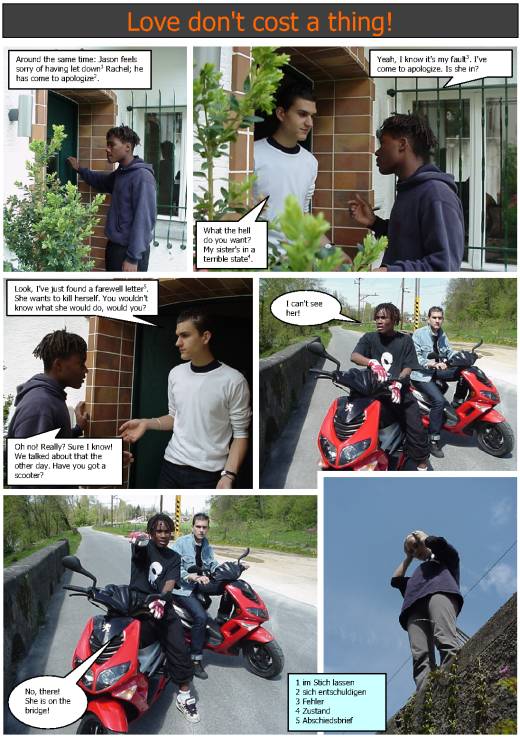
Look at the example photo love story (on the overleaf/attached) and imagine the following: You come into the classroom announcing you are going to read a photo love story. As you might have students above the age of enjoying such simplistic reading, tell them that you want to find out why such stories are rather contrived and clichéd. Then make all the students sit close to your OHP. Some may feel reluctant; tell them they will learn English, which you can use out there. Let them read through page 1 of your story. Eventually after all the sniggers, let them pair up, one of each pair telling the other what he/she has understood in their own language. Do not emphasize past structures, cause after all they are motivated to speak, that should be your main stress. Then ask individuals to spell out the plot: ‘ostracised girl meets hero’, or whatever, while you go on pointing out words you want them to remember, or facts you would like to stress. Then give them the next part of your story telling them that eventually they will again have to tell each other what they have understood. Note that weaker student can always crib from the OHP, so all your students will be happy.
- Tell your students you would like to create a photo love story, like they do at Bravo, etc.
- Form groups of 4 or 5
- Tell them to invent a story
- Tell them that it is not so difficult
- Tell them they need to create a character (human; their age)
- Establish their character in the various groups, i.e. make them come alive (instant theatre)!
- Then ask them to create two further character again (human; their age)
- Eventually ask them to create a third character (human; their age or a pet or object that is really available; The triangle usually works magic, if there is no basic creativity around)
- Let groups of students work on the storyboard on one or two pages. (group writing)
- Correct the stories and create a final version, which is readable.
- In the following lesson read out all stories (listening comprehension)
- Have a vote on the best story and elect a scriptwriter; someone creative or someone you trust to be effective. Then finally sit down with the scriptwriter and work out a script for your shots and the text for your balloons.
Now this is the most sensitive stage to the project. You must make sure everything works here. Batteries (both!) are loaded. Students know where the first ‘take’ is. They will come, they are motivated. Remind them of bringing the ‘requisites’ such as own scooters, cars, and other sorts of paraphernalia.
- Make sure the battery is loaded, and second battery ready!
- Then do your photo shooting.
- Do not save space on your memory-card, but take second shoots, if necessary or unnecessary
(even bad pictures might prove handy later)
- Up-load all pictures using the usual USB connection
- Open a new folder and enter all pictures
- Open a WORD file
- Insert your first picture (see image 1)
- Now you might find that your callout does not move. You will have to format it. To do it right click the shape and chose ‘Format Auto Shape’. Pick ‘Layout’ and set to ‘behind text’. With Word 2004 on Windows you can position your picture very precisely by using the cursor buttons while pressing the CRTL button
- Then open ‘Callouts’ from the ‘Object Palette’ in ‘View’ (image 2)
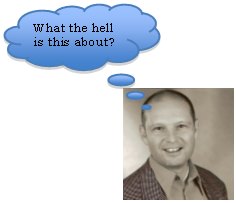
- Chose your callout enter your text (3). Again format the callout this time to ‘in front of text’. Actually you are creating layers.
Image 1.
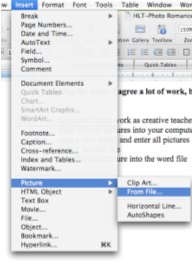
Image 2.
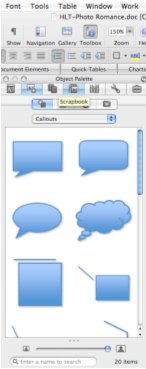
Image 3.
You will have to get used to the handling of all kinds of graphics within a WORD document, but you will benefit extremely from it. It might even put you onto some further ideas; such as it did to me. Best wishes for your project!


Please check the What’s New in Language Teaching course at Pilgrims website.
Please check the Creative Methodology for the Classroom course at Pilgrims website.
Please check the Secondary Teaching course at Pilgrims website.


|